Tesla Fleet Telemetry 是特斯拉官方的开源项目,主要面向车队管理的场景,可以让 Tesla 车辆主动上报数据到自定义的服务器;在官方不断收紧 Owner API,并且 Fleet API 收费的情况下,使用 Fleet Telemetry 作为数据上报的方式,可以作为替代方案
服务 Tessie 就是基于 Fleet Telemetry 的数据构建的看板和分析统计工具:
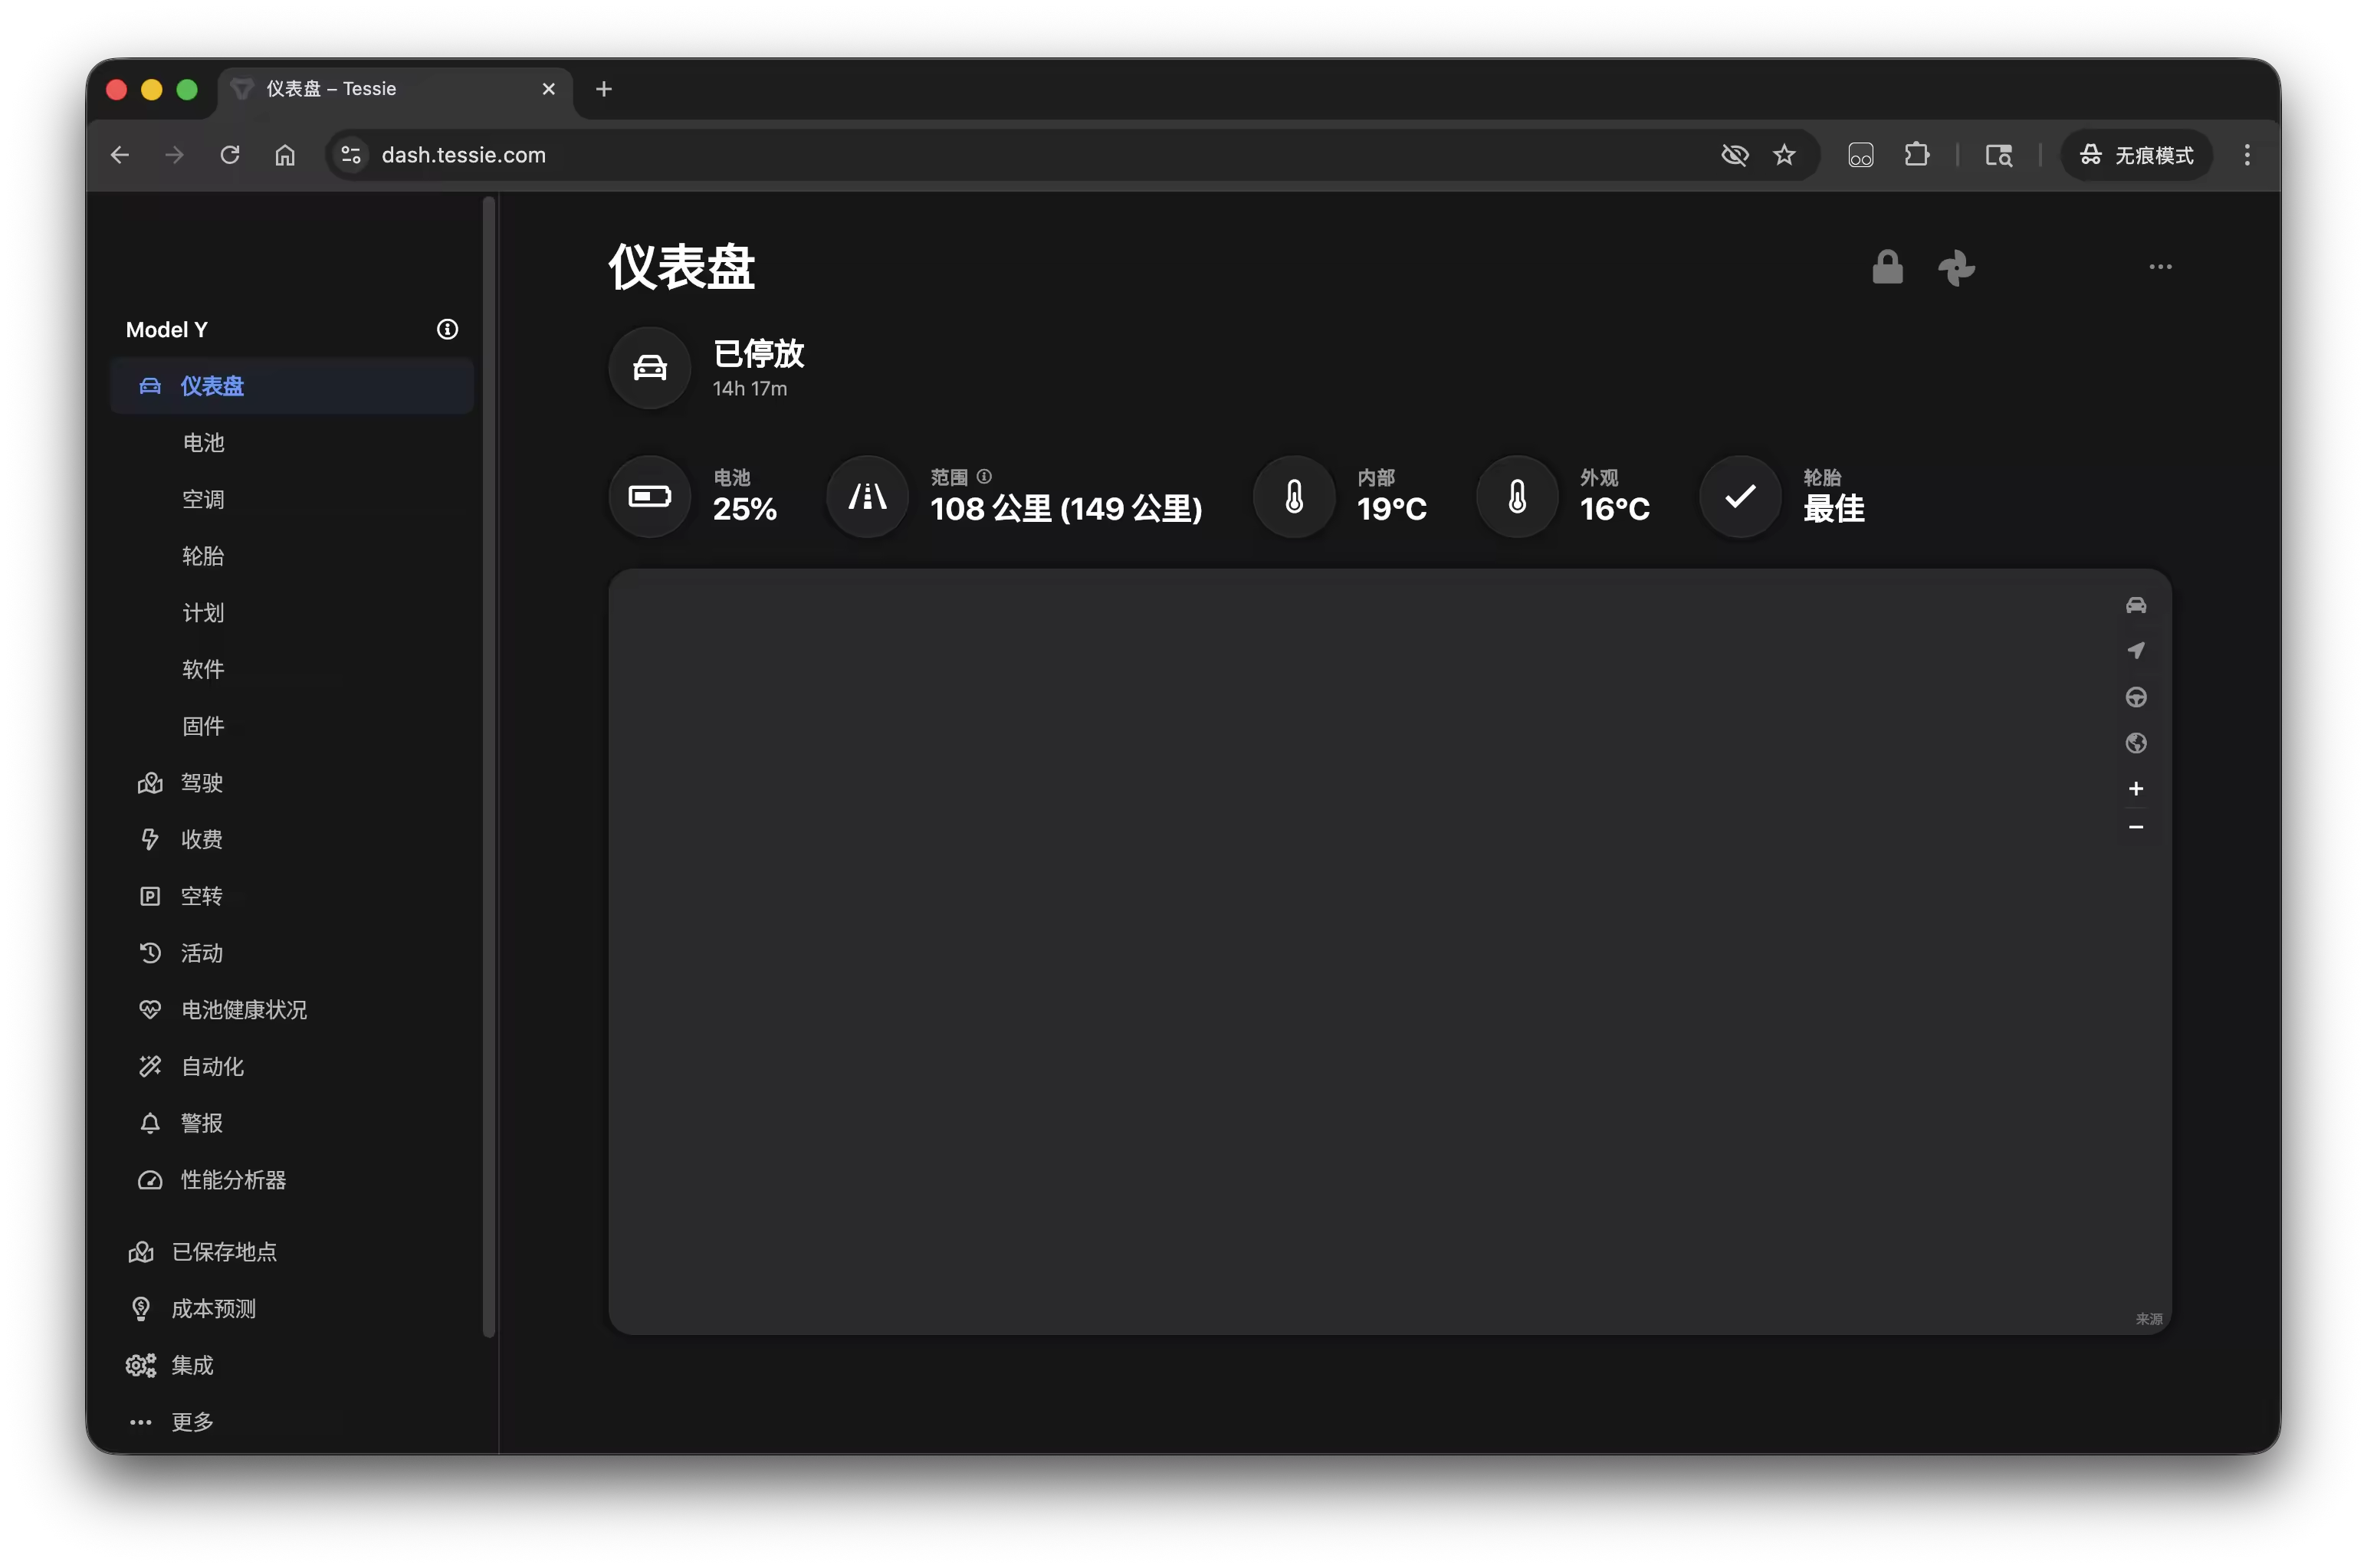
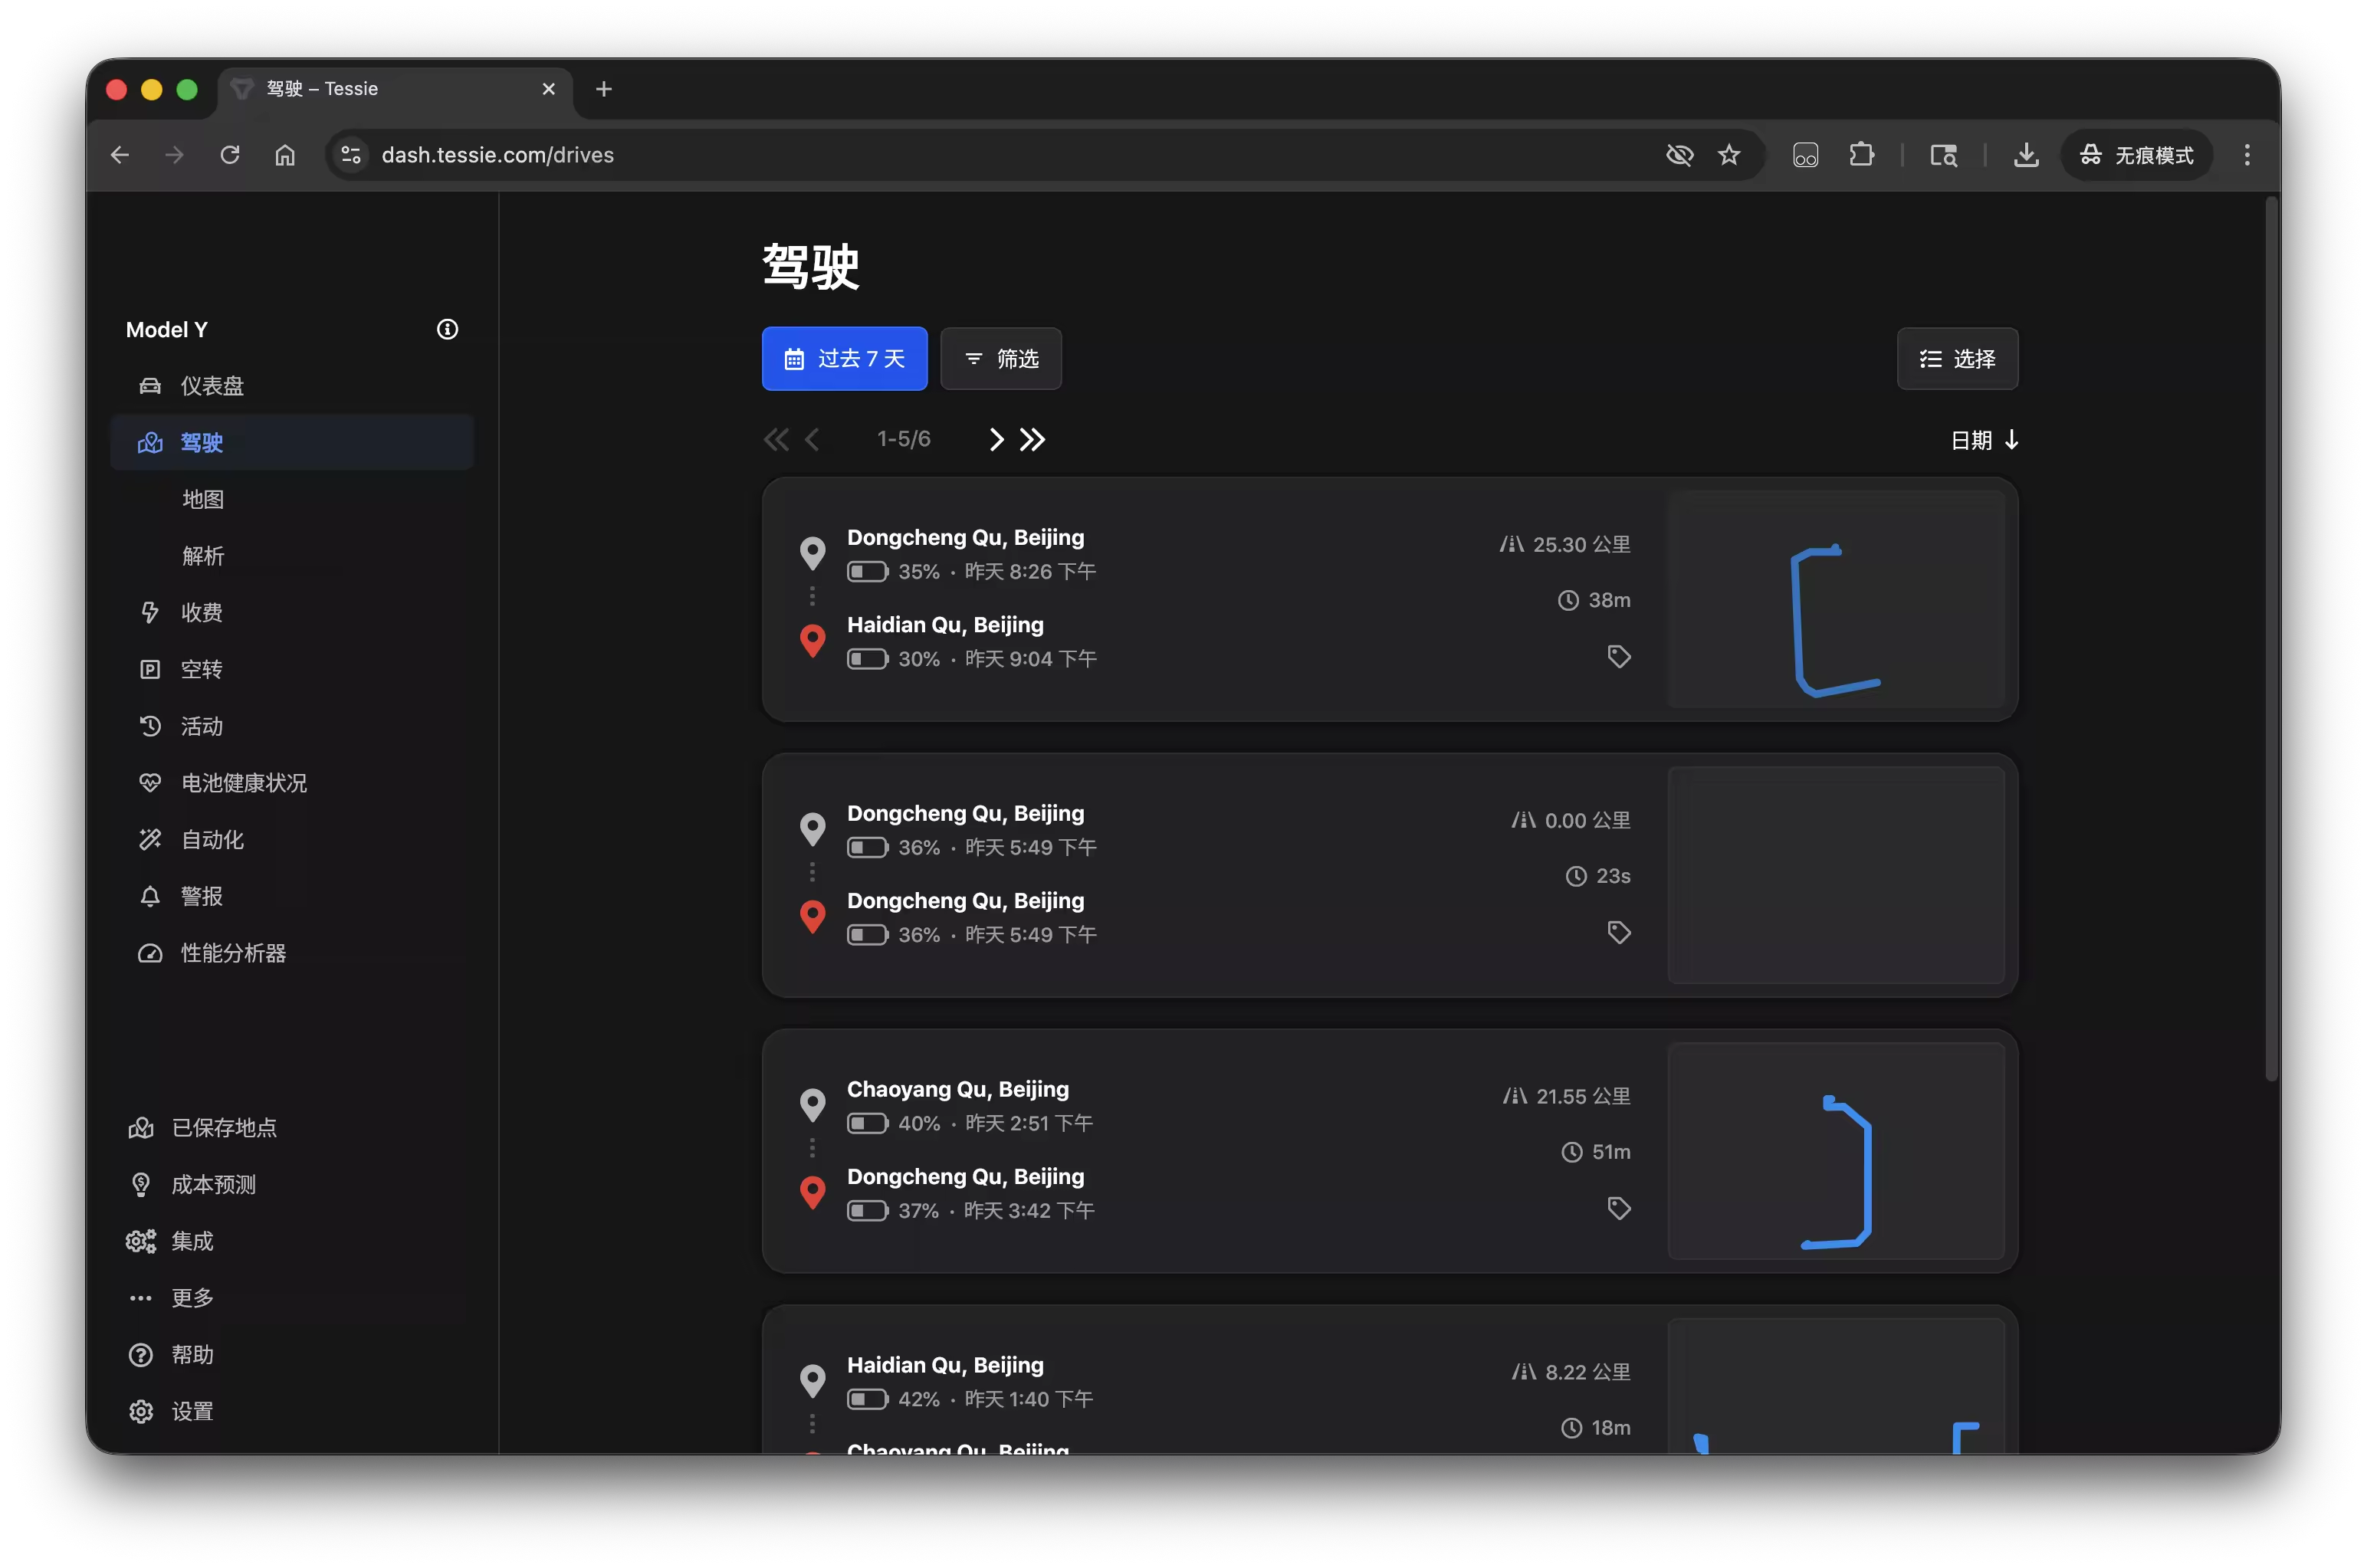
Fleet Telemetry 的功能比较简单,车辆通过 mTLS 连接将数据上报到 Fleet Telemetry 服务器,然后通过 MQTT/Kafka/PubSub 等消息组件将数据分发给下游进行处理;Fleet Telemetry 本身不存储数据,也不提供数据的可视化功能,可以自行处理数据:
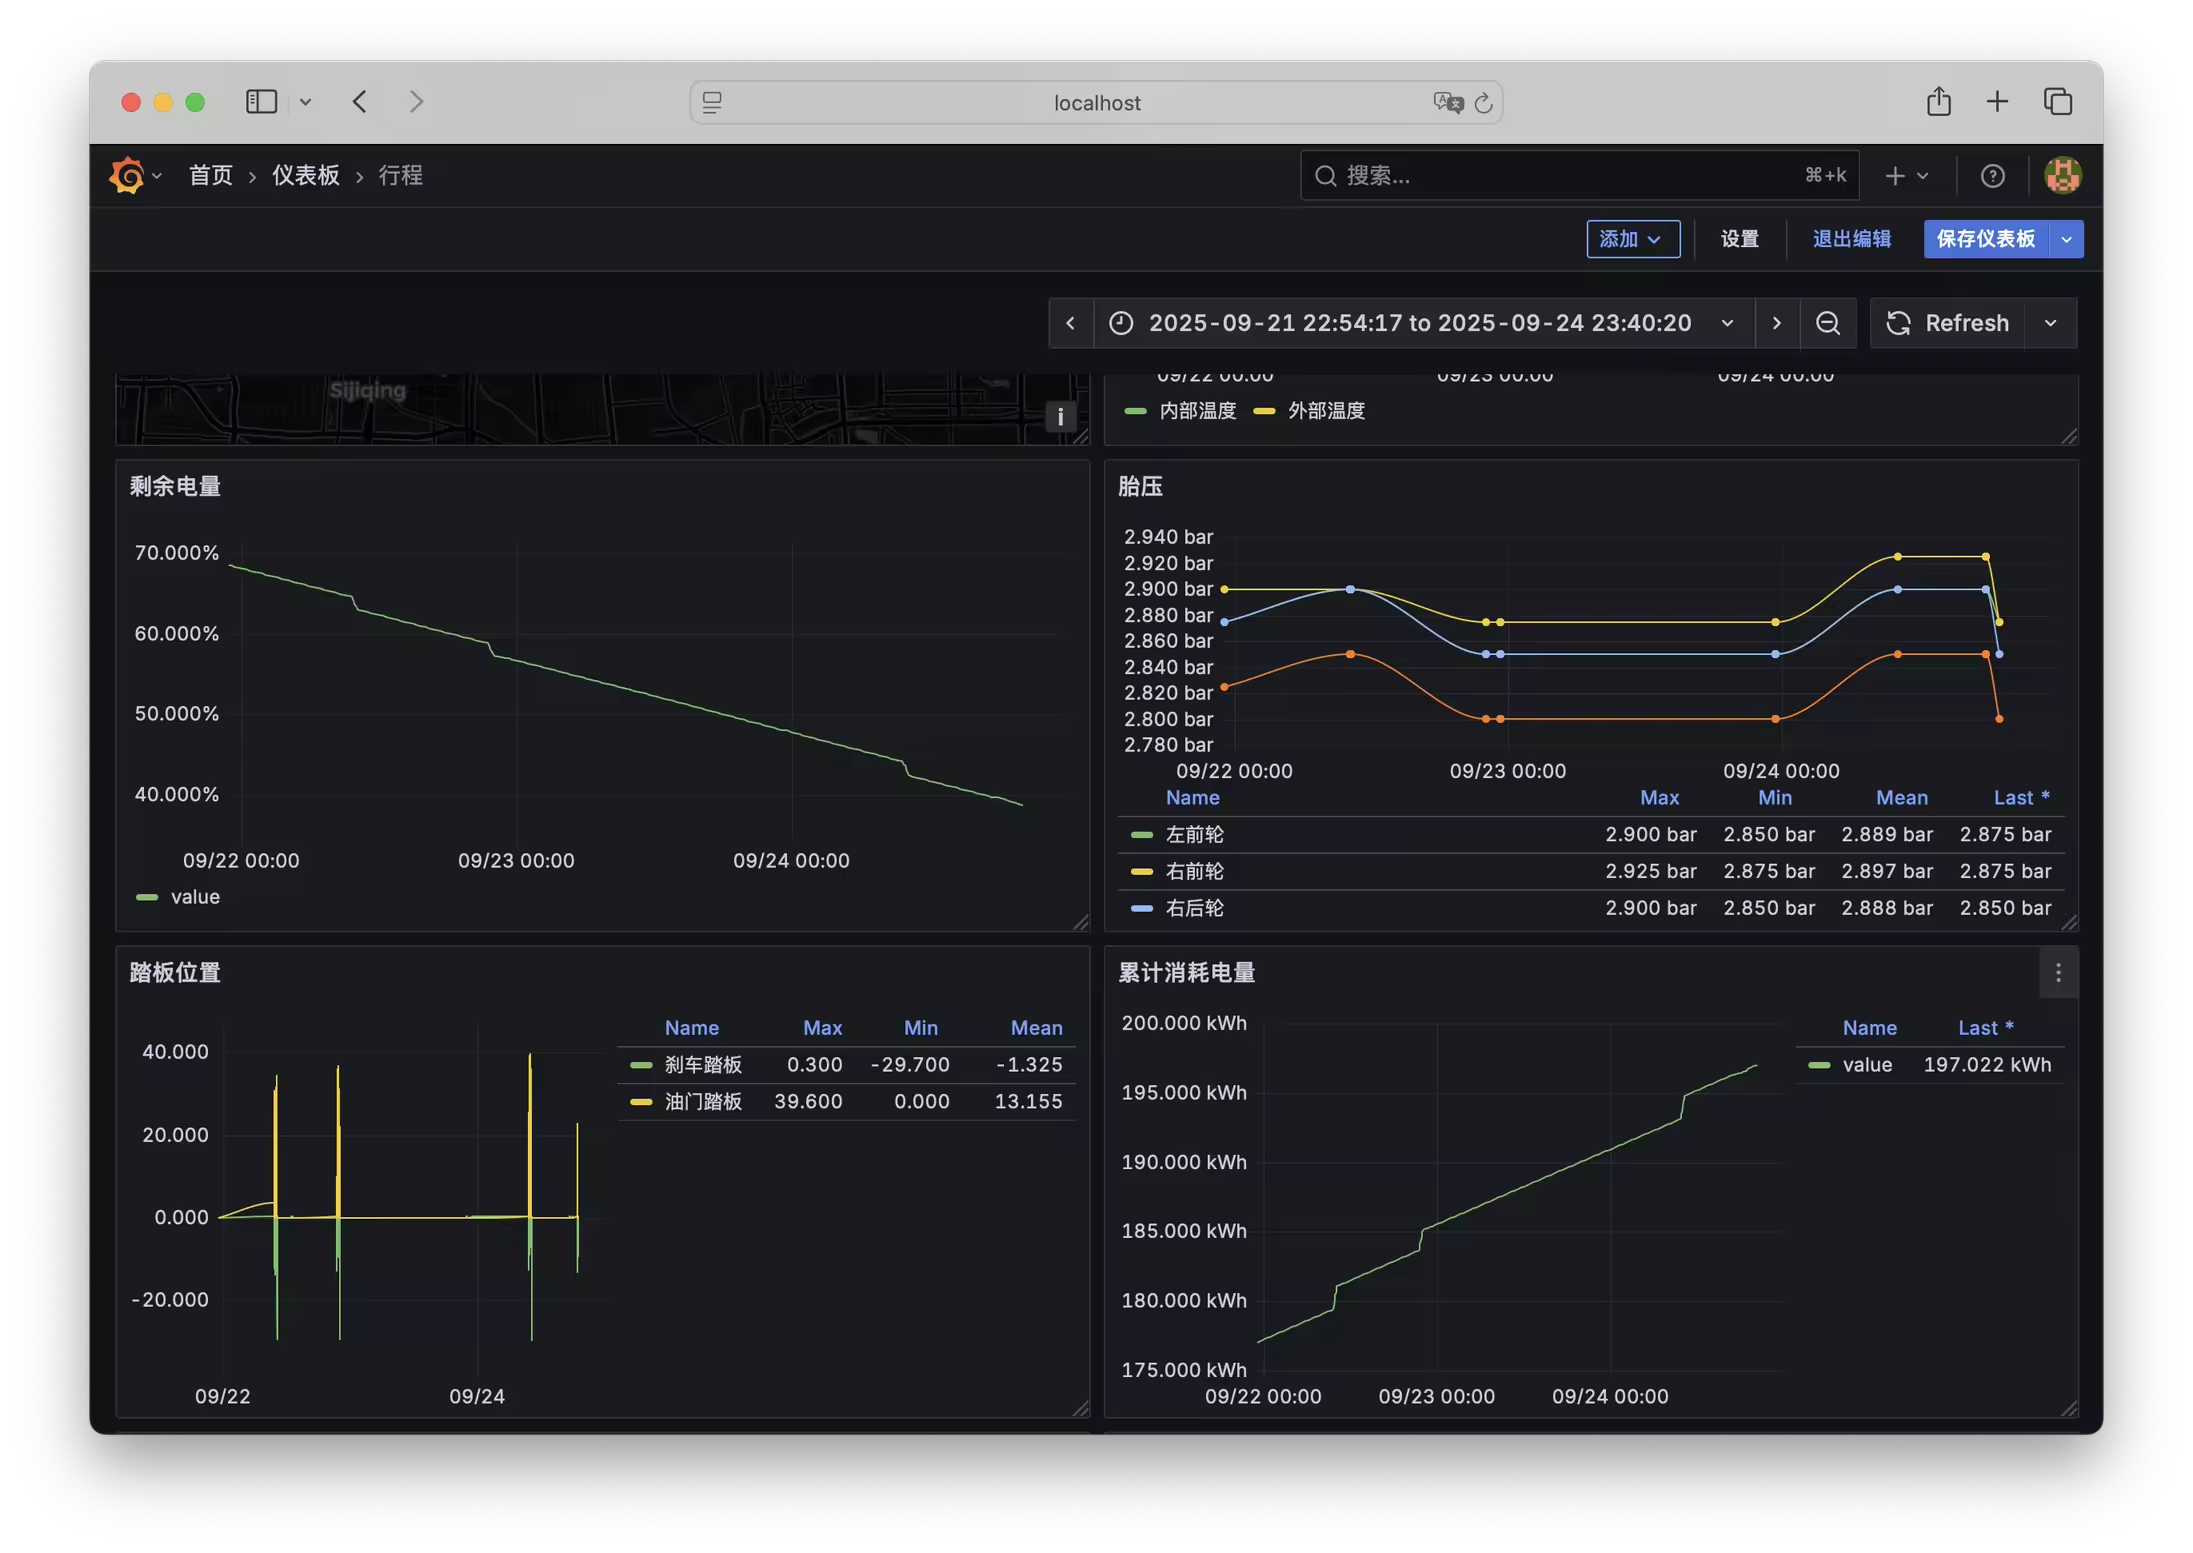
Fleet Telemetry 能获取到的数据和 Owner API 基本是一样的,仅在格式和上报方式上有区别;因此只要适当处理数据格式,也可以兼容 TeslaMate 等工具;详细的数据和警报可以参考 可用数据 和 车辆警报
因为部署 Fleet Telemetry 依赖较多,因此分为多个部分说明:
- 使用 Fleet Telemetry 让 Tesla 车辆主动上报数据进行监控-(一)申请证书
- 使用 Fleet Telemetry 让 Tesla 车辆主动上报数据进行监控-(二)添加虚拟钥匙
- 使用 Fleet Telemetry 让 Tesla 车辆主动上报数据进行监控-(三)部署服务
- 使用 Fleet Telemetry 让 Tesla 车辆主动上报数据进行监控-(四)下发配置
- 使用 Fleet Telemetry 让 Tesla 车辆主动上报数据进行监控-(五)数据处理
- 使用 Fleet Telemetry 让 Tesla 车辆主动上报数据进行监控-(六)监控服务
- 使用 Fleet Telemetry 让 Tesla 车辆主动上报数据进行监控-(七)完整配置说明
一、说明
部署 Fleet Telemetry 需要依赖多个组件,包括:
- Certbot: 用于申请 TLS 证书
- Caddy: 作为反向代理,提供公钥托管,用于特斯拉访问
- tesla-http-proxy: 用于向车辆发送配置指令 (可以用 https://github.com/helloworlde/fleet-telemetry-proxy 在 Cloudflare Worker 部署替代)
- Fleet Telemetry: 车辆数据上报服务
- MQTT: 用于接收并转发车辆上报的数据
系统架构如下:

二、创建域名解析
需要一个域名用于 Fleet Telemetry 服务器的访问,如 fleet.example.com,并且解析到服务器的公网 IP 地址,在创建开发者账号的时候需要保证这个域名是有效的,并且域名中不能包含 tesla 关键字
后续部署 Caddy/tesla-http-proxy/Fleet Telemetry 都需要使用该域名,部署在不同的端口
| 服务 | 地址 | 端口 | 备注 |
|---|---|---|---|
| Caddy | fleet.example.com | 443 | 需要 443端口,需要公网可以访问 |
| tesla-http-proxy | fleet.example.com | 4443 | 任意端口均可,无需公网访问 |
| Fleet Telemetry | fleet.example.com | 12345 | 任意端口均可,需要公网可以访问 |
三、申请 TLS 证书
以 Cloudflare 托管域名为例,使用 Certbot 申请 TLS 证书,其他的工具也可以申请,但是需要手动解析出 CA 等信息比较麻烦,还是推荐使用 Certbot;使用 docker-compose 部署并启动 Certbot;详细可以参考 DNS Plugins
- 创建 Cloudflare API Token
在 Cloudflare 创建一个 API Token,权限选择 “Zone - DNS - Edit”,然后选择对应的域名,然后将 token 写入到 data/cloudflare.ini 文件中
dns_cloudflare_api_token = xxxxxxxxxxxxxxxxxxxxxxxxxxxxxxxx
- 申请证书
创建 docker-compose.yml 文件,内容如下:
services:
  certbot:
    image: certbot/dns-cloudflare:latest
    volumes:
      - ./data:/etc/letsencrypt/:rw
    command: >
      certonly
      --non-interactive
      --agree-tos
      --dns-cloudflare
      --dns-cloudflare-credentials /etc/letsencrypt/cloudflare.ini
      -d fleet.example.com
目录结构如下:
.
├── data
│   ├── cloudflare.ini
└── docker-compose.yaml
然后使用 docker compose up 启动申请证书
[+] Running 1/1
 ✔ Container certbot-certbot-1  Recreated                                                                                                                                                 0.1s
Attaching to certbot-1
certbot-1  | Saving debug log to /var/log/letsencrypt/letsencrypt.log
certbot-1  | Account registered.
certbot-1  | Requesting a certificate for fleet.example.com
certbot-1  | Unsafe permissions on credentials configuration file: /etc/letsencrypt/cloudflare.ini
certbot-1  | Waiting 10 seconds for DNS changes to propagate
certbot-1  |
certbot-1  | Successfully received certificate.
certbot-1  | Certificate is saved at: /etc/letsencrypt/live/fleet.example.com/fullchain.pem
certbot-1  | Key is saved at:         /etc/letsencrypt/live/fleet.example.com/privkey.pem
certbot-1  | This certificate expires on 2025-12-26.
certbot-1  | These files will be updated when the certificate renews.
certbot-1  | NEXT STEPS:
certbot-1  | - The certificate will need to be renewed before it expires. Certbot can automatically renew the certificate in the background, but you may need to take steps to enable that functionality. See https://certbot.org/renewal-setup for instructions.
certbot-1  |
certbot-1  | - - - - - - - - - - - - - - - - - - - - - - - - - - - - - - - - - - - - - - - -
certbot-1  | If you like Certbot, please consider supporting our work by:
certbot-1  |  * Donating to ISRG / Let's Encrypt:   https://letsencrypt.org/donate
certbot-1  |  * Donating to EFF:                    https://eff.org/donate-le
certbot-1  | - - - - - - - - - - - - - - - - - - - - - - - - - - - - - - - - - - - - - - - -
certbot-1 exited with code 0
申请成功后,证书会保存在 data/live/fleet.example.com/ 目录下
.
├── data
│   ├── archive
│   ├── cloudflare.ini
│   ├── live
│   │   ├── README
│   │   └── fleet.example.com
│   │       ├── cert.pem -> ../../archive/fleet.example.com/cert1.pem
│   │       ├── chain.pem -> ../../archive/fleet.example.com/chain1.pem
│   │       ├── fullchain.pem -> ../../archive/fleet.example.com/fullchain1.pem
│   │       ├── privkey.pem -> ../../archive/fleet.example.com/privkey1.pem
│   │       └── README
│   ├── renewal
│   └── renewal-hooks
└── docker-compose.yaml
四、参考文档
- 什么是 Fleet API
- teslamotors/fleet-telemetry
- teslamotors/vehicle-command
- Setting up TeslaLogger with a self-hosted Telemetry Server
- Tesla Developer API - (Fleet API Included)
- The Tesla Fleet API: Unlocking the Future of Connected Mobility
- Tesla Developer API Guide: Account Setup, App Creation, Registration, and Third-Party Authentication Configuration (Part 1)
- 使用 Fleet Telemetry 让 Tesla 车辆主动上报数据进行监控-(一)申请证书
- 使用 Fleet Telemetry 让 Tesla 车辆主动上报数据进行监控-(二)添加虚拟钥匙
- 使用 Fleet Telemetry 让 Tesla 车辆主动上报数据进行监控-(三)部署服务
- 使用 Fleet Telemetry 让 Tesla 车辆主动上报数据进行监控-(四)下发配置
- 使用 Fleet Telemetry 让 Tesla 车辆主动上报数据进行监控-(五)数据处理
- 使用 Fleet Telemetry 让 Tesla 车辆主动上报数据进行监控-(六)监控服务
- 使用 Fleet Telemetry 让 Tesla 车辆主动上报数据进行监控-(七)完整配置说明